Character Creation (WIP)
About
DANGER: GIRL AT WORK :) Not tested it...
Goals for this tutorial.
1. 3D model defaults (WIP)
2. Rigging Model (WIP)
3. Animating Model (WIP)
4. Testing Model and Animations (WIP)
5. Convert Shapes, Skels and Anims with Pipeline (WIP)
6. Include the Character in Game
Necessary for this Tutorial
1. Download the asset repository to C:\Database. (http://media.ryzom.com/)
2. Download the client to C:\ryzom_client. (http://sourceforge.net/projects/ryzom/files/)
3. Compiled all sources and can run and connect to your own server. (http://dev.ryzom.com/projects/ryzom/wiki/Guide)
4. Compiled,installed and loaded the NeL plugins for 3DSMAX. (http://dev.ryzom.com/projects/ryzom/wiki/InstallingMaxPlugins)
5. Installed python 2.6.6. (http://www.python.org/)
6. Downloaded the ryzom_assets_newbieland and merged it into C:\database. (http://sourceforge.net/projects/ryzom/files/)
7. Converted the ryzom_assets database. (http://dev.ryzom.com/projects/ryzom/wiki/Convertingryzom_assetsDatabase)
8. Compiled or downloaded Object Viewer QT (http://dev.ryzom.com/projects/ryzom/wiki/Object-viewer-qt)
9. Setup three virtual drives (w: that points to drive c: | r: that points to c:\ryzom | l: that points to r:\code\ryzom\common\data_leveldesign). (http://en.wikipedia.org/wiki/Subst)
1. 3D model defaults
If you not know modeling, watch tutorial´s in Youtube, sample:
3ds max character modeling tutorial part1:
http://www.youtube.com/watch?v=1NWHUOvo69w
3ds max character modeling tutorial part2:
http://www.youtube.com/watch?v=eN9gi480i5U
or
3Ds Max Character Creation Tutorial Part 1
http://www.youtube.com/watch?v=FJPfIF6o6ck
3Ds Max Character Creation Tutorial Part 2
http://www.youtube.com/watch?v=0rKEarFKA_Y
3Ds Max Character Creation Tutorial Part 3
http://www.youtube.com/watch?v=x0jjCpuqftY
or use the model used in this tutorial:
Dwarf (v0.1 (WIP)): http://www.multiupload.com/RV492GFZ5M
1.1. Naming .MAX Files (60%)
The Names Estructure of .MAX´s files for Actors:
TR_HOM_nameofactor.max
TR = Tryker
HOM = Homin Male
HOF = Homin Female
The Names Estructure of .MAX´s files for Monsters:
TR_MO_nameofacreature.max
TR = Tryker
MO = Monster (No Gender for Monsters)
1.2 Detach and Naming Default Object for your Character (90% :)
(STEP 1). Open the Dwarf Model or Your Own Model .MAX
Usually the object is unique.
This is an sample (Tryker) about object groups:
_visage
_armpad
_gilet
_pantabottes
_bottes
(Step 2). For Detach your model and make it in various objects.
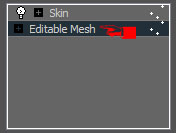
(Step 2.1). Click in Modify , Click in Editable Mesh , Click in Vertex
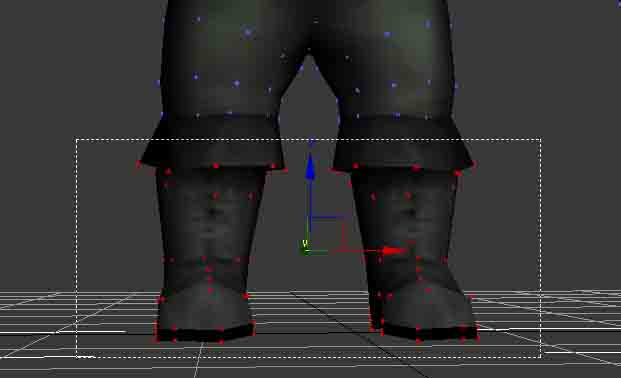
(Step 2.2). Select the Vertex do you want to separate object (sample: bottes)
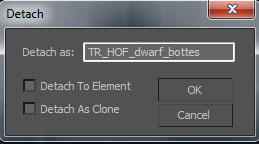
(Step 2.3). Click in Detach
(Step 2.4). Naming the Object and OK
(STEP 2.5). Repeat the STEP´s 2.2, 2.3, 2.4 with the _visage _armpad _gilet _pantabottes
1.3. Saving the Model in Database Folder (WIP)
1.3.1. Saving Character (Actors) Models
Choose an Race for Include your Creature and create 9 directories, sample in tree:
C:\Database\Stuff\RACE_OF_YOUR_CHOICE\Agents\Actors\male
C:\Database\Stuff\RACE_OF_YOUR_CHOICE\Agents\Actors\female
C:\Database\Stuff\RACE_OF_YOUR_CHOICE\Agents\Actors\visage
C:\Database\Stuff\RACE_OF_YOUR_CHOICE\Agents\Actors\male\Animations
C:\Database\Stuff\RACE_OF_YOUR_CHOICE\Agents\Actors\male\Animations\Anims
C:\Database\Stuff\RACE_OF_YOUR_CHOICE\Agents\Actors\male\Animations\Skeletons
C:\Database\Stuff\RACE_OF_YOUR_CHOICE\Agents\Actors\female\Animations
C:\Database\Stuff\RACE_OF_YOUR_CHOICE\Agents\Actors\female\Animations\Anims
C:\Database\Stuff\RACE_OF_YOUR_CHOICE\Agents\Actors\female\Animations\Skeletons
Save you .MAX Model in Directory:
C:\Database\Stuff\RACE_OF_YOUR_CHOICE\Agents\Actors\male
C:\Database\Stuff\RACE_OF_YOUR_CHOICE\Agents\Actors\female
Save you .MAX Animations Files in Directory:
C:\Database\Stuff\RACE_OF_YOUR_CHOICE\Agents\Actors\male\Animations\Anims
C:\Database\Stuff\RACE_OF_YOUR_CHOICE\Agents\Actors\female\Animations\Anims
Save you .MAX Biped File in Directory:
C:\Database\Stuff\RACE_OF_YOUR_CHOICE\Agents\Actors\male\Animations\Skeletons
C:\Database\Stuff\RACE_OF_YOUR_CHOICE\Agents\Actors\female\Animations\Skeletons
1.3.2. Saving Creature (Mobs) Models
Choose an Race for Include your Creature and create 4 directories, sample in tree:
C:\Database\Stuff\RACE_OF_YOUR_CHOICE\Agents\Monsters\creature_name
C:\Database\Stuff\RACE_OF_YOUR_CHOICE\Agents\Monsters\creature_name\Animations
C:\Database\Stuff\RACE_OF_YOUR_CHOICE\Agents\Monsters\creature_name\Animations\Anims
C:\Database\Stuff\RACE_OF_YOUR_CHOICE\Agents\Monsters\creature_name\Animations\Skeletons
Save you .MAX Model in Directory:
C:\Database\Stuff\RACE_OF_YOUR_CHOICE\Agents\Monsters\creature_name
Save you .MAX Animations Files in Directory:
C:\Database\Stuff\RACE_OF_YOUR_CHOICE\Agents\Monsters\creature_name\Animations\Anims
Save you .MAX Biped File in Directory:
C:\Database\Stuff\RACE_OF_YOUR_CHOICE\Agents\Monsters\creature_name\Animations\Skeletons
2.Rigging Model (80%)
(STEP 1). First Open your Dwarf.max of directory:
C:\Database\Stuff\RACE_OF_YOUR_CHOICE\Agents\Actors_or_Monsters\creature_name_or_gender_of_actor\name_of_creature_or_actor.max
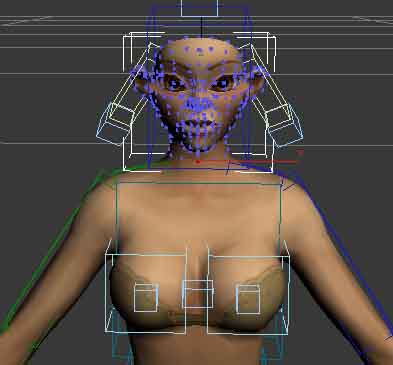
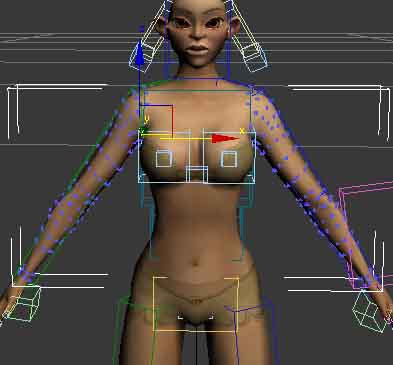
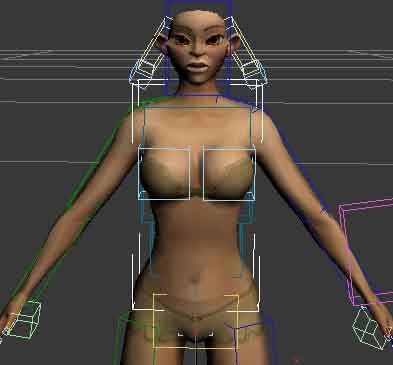
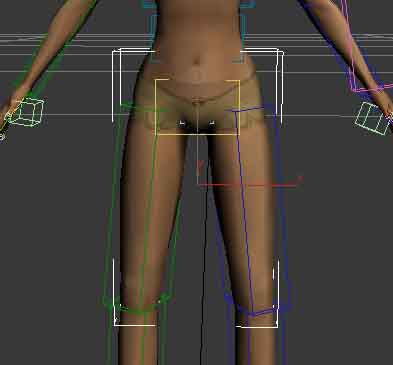
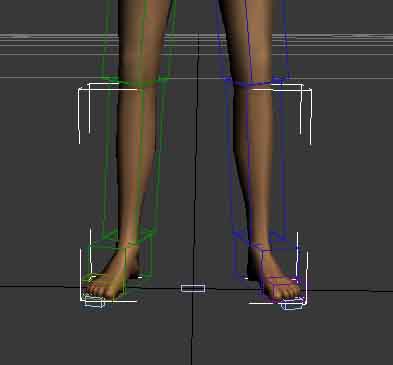
(STEP 2). Make an Biped in Dwarf (For Rigging the Model is very simple use Biped Tool for create an Biped in your Dwarf, follow the tutorial to position and resize the Bones compatible with you character.)
If you not know 3D Studio MAX for Rigging your Model, watch this tutorial´s for it:
http://www.youtube.com/watch?v=si4N6IdlJq8
IMPORTANT: The Bip01 Pelvis is a principal Bip Bone, is the one that must necessarily exist, the others bones is optional. (*depend of your object, sample: model no head or no arm´s)
NOTE: Use the default names for biped bones, sample: Bip01 Pelvis
(STEP 3). Save your Model with the Biped in this directory:
C:\Database\Stuff\RACE_OF_YOUR_CHOICE\Agents\Actors_or_Monsters\creature_name_or_gender_of_actor\name_of_creature_or_actor.max
(STEP 4). Delete your model and click Save as... only Biped save in directory:
C:\Database\Stuff\RACE_OF_YOUR_CHOICE\Agents\Actors_or_Monsters\creature_name_or_gender_of_actor\Animations\Skeletons\name_of_creature_or_actor.max
3. Animating Model (WIP)
(STEP 1). Open the Dwarf Rigging (Biped) ( C:\Database\Stuff\RACE_OF_YOUR_CHOICE\Agents\Actors_or_Monsters\creature_name_or_gender_of_actor\name_of_creature_or_actor.max )
(STEP 2). Anim your Biped with 1 animation
If not konow Anim in 3D Studio MAX use this possibilities:
2.1. Your own Animation´s
3DS Max - Lesson 2 - Biped Animation
http://www.youtube.com/watch#!v=9LxRCJ8DbYE
2.2. MoCap (99%)
For import MoCap (.BVH .BIP) in your Biped, follow this tutorial:
http://www.unitylabs.net/tutorials/animation/motion-capture-for-max/2
FREE MoCap´s for Download:
http://www.beyondmotion.com.au/free_motion.html
http://www.motioncapturedata.com/search/label/BVH
http://blenderartists.org/forum/showthread?t=3284
http://www.blendernation.com/2007/11/27/20-free-motion-capture-files/
2.3. Use RyzomCore .anim in your Model
or use the RyzomCore Animations for your Character:
you can use the animations of RyzomCore in your character! :)
This is easy, you can use the all Actors Animations (.anim) in your character.
3. Saving the Animations Files (80%)
Anim your model (biped) and in each animation save it in diferent file, sample:
C:\Database\Stuff\RACE_OF_YOUR_CHOICE\Agents\Monsters\creature_name\Animations\Anims\_walk.max (Walk Animation)
C:\Database\Stuff\RACE_OF_YOUR_CHOICE\Agents\Monsters\creature_name\Animations\Anims\_sit_init.max (Sitting)
C:\Database\Stuff\RACE_OF_YOUR_CHOICE\Agents\Monsters\creature_name\Animations\Anims\_sit_loop.max (Stay Sitting, "Down syndrome")
C:\Database\Stuff\RACE_OF_YOUR_CHOICE\Agents\Monsters\creature_name\Animations\Anims\_sit_end.max (raising)
NOTE: If you use MoCap, save each Biped with MoCap in different file. 1 animations (mocap with biped) per file .max
4. Testing Model and Animations (70%)
For test your model and animations export it with NeL Export:
(STEP 1). Export the Model (.Shape) File in Directory with the same name the .max but with .shape:
C:\Database\Stuff\RACE_OF_YOUR_CHOICE\Agents\Monsters\creature_name
(STEP 2). Export the Animations (.anim) Files in Directory with the same name the .max but with .anim:
C:\Database\Stuff\RACE_OF_YOUR_CHOICE\Agents\Monsters\creature_name\Animations\Anims
(STEP 3). Export the Skeleton (.skel) File in Directory with the same name the .max but with .skel:
C:\Database\Stuff\RACE_OF_YOUR_CHOICE\Agents\Monsters\creature_name\Animations\Skeletons
Run the Object Viewer QT and Open you creature_name.shape
5. Convert Shapes, Skels and Anims with Pipeline (90%)
Follow the Tutorial of ChrisNewman ( http://dev.ryzom.com/projects/ryzom/wiki/RebuildingTheNewbieLandWith_TheBuildPipeline )
Step´s:
(STEP 1). Follow Step 10 of Pre Constraints
(STEP 2). Follow All Steps of Exporting Assets Using The Build Pipeline
6. Include the Character in Game (WIP)
6.1. Add Character in Game (WIP)
6.2. Add Monster in Game
(STEP 1). For Creatures (Monsters) Follow the Tutorial AddingMobs http://dev.ryzom.com/projects/ryzom/wiki/AddingMobs

