Configuring and running Ryzom Core server on GNU/Linux
Preparing Packages
For Debian/Ubuntu users you will need to install the following packages:
sudo apt-get install apache2 php5 php5-mysql php5-gd rrdtool screen
Making changes in services config files
- Change FSListenHost in
code/ryzom/server/frontend_service.cfgto your address (e.g. 192.168.0.1). If you set up server on different machine, remember it has to be address that's reachable on client host.
If your frontend service is available through a firewall using NAT and a mapped IP address this is how you can advertise that external IP address. For example if your FS is on 192.168.1.100 internally but your firewall maps 74.125.225.210 through to your FS you would want to configure FSListenHost to be the address the clients connect to: 74.125.225.210.
Configuring Apache and web tools
- Ubuntu user: Don't forget to install php5-mysql synaptic packet and to uncomment "extension=mysql.so" into "php.ini" file to allow mysql connection from php code.
- Configure Apache with PHP. Make a VirtualHost (usually in
/etc/apache2/httpd.conf) for the login scripts and admin app (replace DocumentRoot with your own path).
For current Ubuntu versions you can just edit the file default in /etc/apache2/sites-available/ - substituting what is listed below for what is already there. It may be helpful to break this into multiple site configuration files but isn't necesasry.
Don't forget to change the paths used below to match where your source is checked out! They are highlighted in red.
Apache 2.4
Listen 40916
<VirtualHost *:40916>
<Directory "/home/username/ryzom/code/ryzom/tools/server/">
Options -Indexes FollowSymLinks MultiViews
IndexOptions FancyIndexing FoldersFirst NameWidth=*
AllowOverride All
Require all granted
</Directory>
ServerAdmin admin@localhost
DocumentRoot /home/username/ryzom/code/ryzom/tools/server/www
ServerName localhost
</VirtualHost>
<VirtualHost *:80>
ServerName localhost
DocumentRoot "/home/ryzom/ryzomcore/code/ryzom/tools/server/ryzom_ams/www/html/"
<Directory /home/ryzom/ryzomcore/code/ryzom/tools/server/ryzom_ams/www/html/>
Options -Indexes +FollowSymLinks +MultiViews
AllowOverride All
Require all granted
DirectoryIndex index.php
AddType text/html .php .phps
AddHandler application/x-httpd-php .php
AddHandler application/x-httpd-php-source .phps
</Directory>
Alias /admin/ /home/username/ryzom/code/ryzom/tools/server/admin/
<Directory "/home/ryzom/ryzomcore/code/ryzom/tools/server/admin/">
Options -Indexes +FollowSymLinks +MultiViews
AllowOverride All
Require all granted
DirectoryIndex index.php
AddType text/html .php .phps
AddHandler application/x-httpd-php .php
AddHandler application/x-httpd-php-source .phps
</Directory>
</VirtualHost>
Apache 2.2
Listen 40916
<VirtualHost *:40916>
<Directory "/home/username/ryzom/code/ryzom/tools/server/">
Options -Indexes FollowSymLinks MultiViews
IndexOptions FancyIndexing FoldersFirst NameWidth=*
AllowOverride All
Order allow,deny
Allow from all
</Directory>
ServerAdmin admin@localhost
DocumentRoot /home/username/ryzom/code/ryzom/tools/server/www
ServerName localhost
</VirtualHost>
<VirtualHost *:80>
ServerName localhost
DocumentRoot "/home/username/ryzom/code/ryzom/tools/server/ryzom_ams/www/html/"
Alias /admin/ /home/username/ryzom/code/ryzom/tools/server/admin/
<Directory "/home/username/ryzom/code/ryzom/tools/server/admin/">
Options -Indexes FollowSymLinks MultiViews
IndexOptions FancyIndexing FoldersFirst NameWidth=*
AllowOverride All
Order allow,deny
Allow from all
DirectoryIndex index.php
AddType text/html .php .phps
AddHandler application/x-httpd-php .php
AddHandler application/x-httpd-php-source .phps
</Directory>
</VirtualHost>
Advanced Configuration Topics
- See Configuring WebTT for configuration details regarding the Web Translation Tool.
- See Configuring Ryzom API for configuration details regarding configuring the Ryzom API and WebIG applications.
- See Configuring the Character Achievement App for information on setting up the Character Achievements app.
- See Configuring Ryzom Ring Server for configuration details regarding the configuration of a Ryzom Ring shard.
- See Configuring Patching Services for configuration details regardin the patch site and tools.
In order to execute system commands like restarting services you will need to be able to log in as root or execute the command using sudo, e.g.:
sudo /etc/init.d/apache2 restart
- Restart Apache by typing the following.
/etc/init.d/apache2 restart
- Make sure the directory's requiring write permissions is writeable by all.
chmod a+w code/ryzom/tools/server/admin/graphs_outputchmod a+w code/ryzom/tools/server/admin/templates/default_cchmod a+wcode/ryzom/tools/server/www/login/logschmod a+w code/ryzom/tools/server/ryzom_ams/www/chmod a+w code/ryzom/tools/server/ryzom_ams/www/html/cachechmod a+w code/ryzom/tools/server/ryzom_ams/www/html/templates_c
Setting up MySQL
The configuration files in
- code/ryzom/server
- code/ryzom/tools/server/ryzom_ams/www/config.default.php
- code/ryzom/tools/server/admin/config.php
- code/ryzom/tools/server/www/login/config.php
expect your user to be named 'shard' with NO PASSWORD. If you decide to use a different name for your MySQL user, or assign it a password, you will need to go through the files and change these values from 'shard' and "" wherever they appear. (they appear in several .cfg files)
Since this (and a password) can lead to unexpected errors (eg. error '4000') it is best to make sure everything works correctly with the defaults first.
Parse Error
If you are getting strange errors some config files may have Windows editor "control-M" endline characters, which appears as a blue ^M in vim. You can remove it with this vi command, noting that ^M is typed by pressing Ctrl+V followed by Ctrl+M:
find /home/username/ryzom/code -name "*.cfg" -name "*.php" | xargs grep -l '^M'

# if there are none, Vim will gladly eat your shell if you xargs it
vi <listed filename>

# Next issue this command to vi :%s/^M//g
Running MySQL Auto Install
Ryzom AMS now includes auto install scripts for the mysql database, all you have to do is load your DocumentRoot on port 80 that was setup above, for example http://127.0.0.1
A page will load that looks like the below, type in your mysql root user/pass.
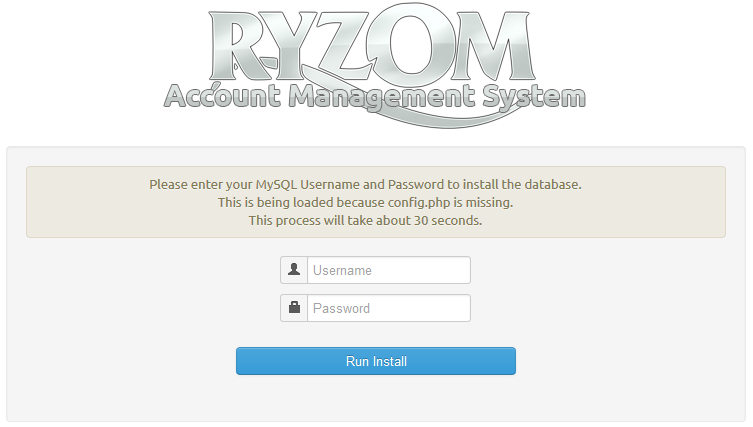
The installer will by default setup permissions for the user "shard" if you want to use a different user you will need to run the below sql statements.
GRANT ALL ON nel.* TO newuser@localhost;
GRANT ALL ON nel_tool.* TO newuser@localhost;
GRANT ALL ON ring_open.* TO newuser@localhost;

FLUSH PRIVILEGES;
Running the shard
Very Important Note
Your shard will not work if you do not have built landscape assets and leveldesign data deployed to the server. The build pipeline output of W:\shard must be deployed to the shard. The in-repository configuration does not have these paths correctly configured yet. Running the shard from inside the code repository is very bad practice.
If you're running on Ubuntu or Debian, the default shell is actually dash and the shard/screen scripts will not run correctly in dash. The steps following will have you switch to bash. If you want to keep using dash as the default shell then you will need change the shebang from /bin/sh to /bin/bash in the following files:
code/ryzom/tools/scripts/linux/shardcode/ryzom/server/shard.screen.rc
This note no longer applies. Scripts have been modified for /bin/sh.
Very Very Important Note
The information below is not valid for the latest repository version.
Great screen how-to at: http://www.rackaid.com/resources/linux-screen-tutorial-and-how-to/
- Run commands:
# if you're on Ubuntu or Debian - disable dash:
[[ `lsb_release -si` = 'Ubuntu' ]] || [[ `lsb_release -si` = 'Debian' ]] &&\
    # Change your selection to 'no' so it uses bash instead.
    sudo dpkg-reconfigure dash
echo "export RYZOM_PATH=/home/user/ryzom/code/ryzom" >> ~/.bashrc
source ~/.bashrc
echo "export PATH=$PATH:$RYZOM_PATH/tools/scripts/linux" >> ~/.bashrc
source ~/.bashrc
- Start the shard by typing: shard start
Running and Monitor the Shard
- To start: shard start
- To stop: shard stop
- To view screen: shard join
- To switch monitored service: Ctrl-A+n
To make the shard start on boot use the below init script, you will need to change "export RYZOM_PATH=/home/username/ryzom/code/ryzom" to your path
Service Script
#!/bin/sh
# chkconfig: 235 99 10
# description: Start or stop the Ryzom Core server
#
### BEGIN INIT INFO
# Provides: Ryzom Core Shard
# Required-Start: $network $syslog
# Required-Stop: $network
# Default-Start: 2 3 5
# Default-Stop: 0 1 6
# Description: Start or stop the Ryzom Core server
### END INIT INFO
export RYZOM_PATH=/home/username/ryzom/code/ryzom
export PATH=$PATH:$RYZOM_PATH/tools/scripts/linux
start="$RYZOM_PATH/tools/scripts/linux/shard start"
stop="$RYZOM_PATH/tools/scripts/linux/shard stop"
lockfile=/var/lock/ryzomcoreshard
name='Ryzom Core Shard'
case "$1" in
'start')
$start >/dev/null 2>&1 </dev/null
RETVAL=$?
if [ "$RETVAL" = "0" ]; then
touch $lockfile >/dev/null 2>&1
fi
;;
'stop')
$stop
RETVAL=$?
if [ "$RETVAL" = "0" ]; then
rm -f $lockfile
fi
;;
'status')
if [ -f $lockfile ]; then
echo "$name is running"
RETVAL=0
else
echo "$name is stopped"
RETVAL=1
fi
;;
'restart')
$stop ; $start
RETVAL=$?
;;
*)
echo "Usage: $0 { start | stop | restart }"
RETVAL=1
;;
esac
exit $RETVAL
Client login errors
- If your client gives you error messages on connect, check Client Connect Errors.
Setting up Web Applications
For user administration and ticketing you will need to Setup the AMS
Creating a client
Now you need to create your own client please see Creating a Client
Notes
If you want to use your shard with the core client, you will have to copy the following file into code/ryzom/common/data_common: