Importing MAX Assets
DEPRECATED
*** IMPORTANT ***
*** IMPORTANT ***
The information below is for developer reference only.
*** IMPORTANT ***
This walk-through is intended for opening single max files downloaded from the media website, or from an older unconverted asset archive.
The original Ryzom assets were made in a much older version of 3DS Max than is currently available.
Texture assets paths referred to by the files also need to be stripped off their original network paths.
It is therefore necessary to follow a few steps, in order to correctly use these assets.
This tutorial assumes that you have already set up your 3ds Max environment to work with NeL related graphical content.
If you haven't done so yet, please refer to the instructions for Installing the Max Plugins.
Importing
Extracting Assets To the Project Folder
The 3ds Max files can be downloaded by themselves, or together with their dependencies in a compressed 7z file format. If you cannot open this file format yet, you should install a file extract utility such as 7-Zip, which you can download from http://www.7-zip.org/. The contents of this 7z file should be extracted inside the "scenes" folder in your 3ds Max Project Folder.
If you're using the complete assets archive instead of seperately downloaded max files, it is recommended to make the Database directory accessible from W:\Database, by virtually mounting the folder where the assets archive is extracted under a virtual W:\ drive. It is possible to have W:\ point to a network drive, in order to work directly with other artists in the same filesystem.
Importing the MAX File
If you open this file directly in 3ds Max you may experience several viewport configuration glitches. This is worked around by merging the file into a new scene.
First you must reset your scene by going trough File > Reset.
Then, go to File > Merge, select the file, and open it.
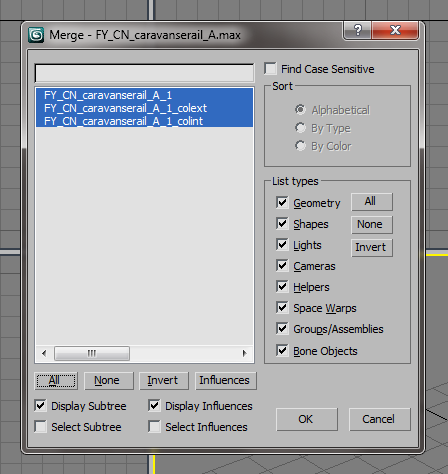
You will then be presented with the Merge dialog.
Hit the All button to select everything in the file, and then press Ok.
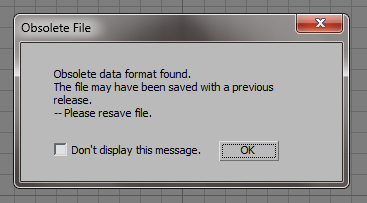
You will now get a warning about the obsolete fileformat saying that you should resave, hit Ok.
It is possible that you get another warning about missing external plugins, these are not important, and you can just click Open to skip this.
Hit Z on your keyboard to center your camera on the object.
Now that the mesh is loaded, you should save the max file, as the earlier warning message instructed. You can overwrite the old file, or append something like _2010 to the original file name.
You must save the max file to the same folder as where the original and the textures are. If you fail to do so, 3ds Max will fail to find the texture paths later on.
Updating the Texture Paths
As the texture paths currently still refer to the original developers' network paths, it is necessary to fix these paths. A maxscript is included with NeL to do this for you. Just go to MaxScript > Run Script and open "nel_assets_png.ms" if you've downloaded assets seperately, or "nel_assets_png_database.ms" if you're using the assets archive.
In case you're using "nel_assets_png_database.ms", you must either mount the asset database under W:\, or modify the script to your path. If you don't get any warning, the paths should have been updated. You can verify this by going to File > Asset Tracking and hitting the Refresh button there. In this window you can also see if you are missing any textures. If so, you can download these seperately from the asset database.
Making the Textures Visible
To finally make the textures visible, go to Views > Show Materials in Viewport As > Standard Display with Maps.
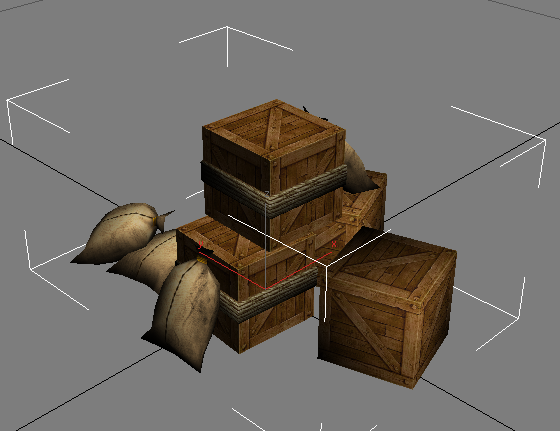
You should now see the mesh with it's diffuse texture visible. Note that this is not the final in-game appearance, as there are several NeL specific options in the NeL Material which are not visible in the 3ds Max Viewport. You can use the object viewer included with the NeL 3ds Max plugins to see the object as it would appear in-game under default lighting.
Please use the new assets archive, the latest plugins for max, the latest tools, and the latest data repository.
https://ryzomcore.atlassian.net/wiki/display/RC/Downloads+for+Windows
http://dl.kaetemi.be/ryzom/assets/ryzom_assets_rev3.7z
https://bitbucket.org/ryzom/ryzomcore-data