...
1. Launch tile_edit_r.exe (C:\ryzom\code\nel\tools\3d\tile_edit\)
You should get....

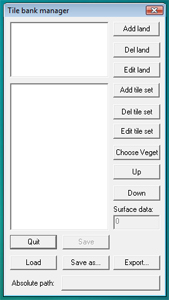
2.Click on the button next to "Absolute path".
Change the path to C:\Database\landscape\_texture_tiles\.
...
At this point you should click save.

8. Navigate to C:\Database\Landscape\_texture_tiles\jungle And open the contents of 1-junglemousse,12-vasejungle,displace and Transitions\ AlphaNoiseA in Photoshop (You can also use Gimp if you like).
...
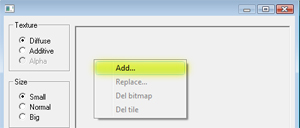
11. Select> Diffuse,128x128 and then right click in the empty area to the right and choose "Add".

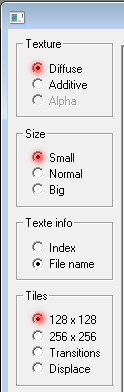

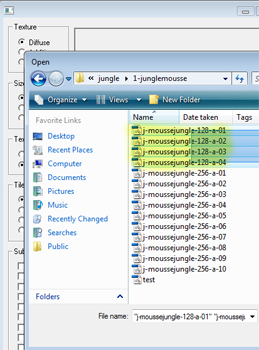
12. Navigate to jungle\1-junglemousse, Select all the 128x128 .tga images (4 total) and click "OK".


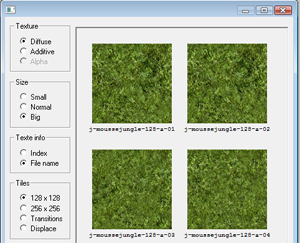
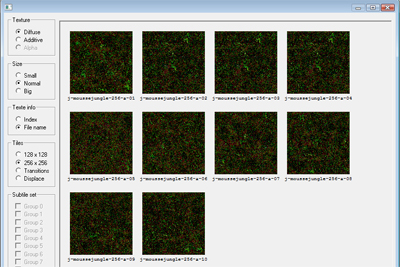
13. Select> Diffuse,256x256 and then right click in the empty area to the right and choose "Add", Repeat step 12 this time selecting all 10 256x256 images.

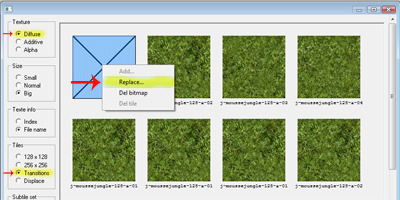
14. Select> Diffuse,Transitions and select the first square on the right.
Right click, Select replace and choose any 128x128 texture from the 1-junglemousse set.
Do the same to the remaining squares using the 4 128x128 1-junglemousse textures randomly.

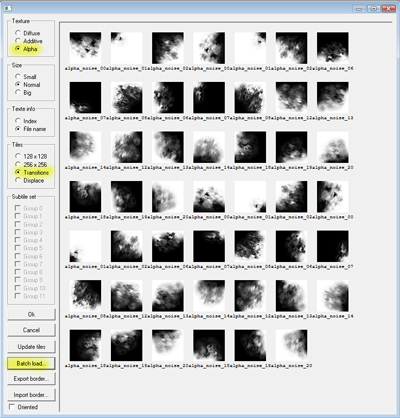
15. Select> Alpha,Transitions and Click "Batch load...".
Navigate to C:\Database\Landscape\_texture_tiles\jungleTransitions\AlphaNoiseA and select alpha_noise_00.tga and click "OK".
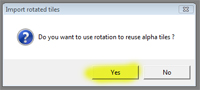
At this point you will be prompted to reuse the rotation of the alpha tiles, select "Yes".


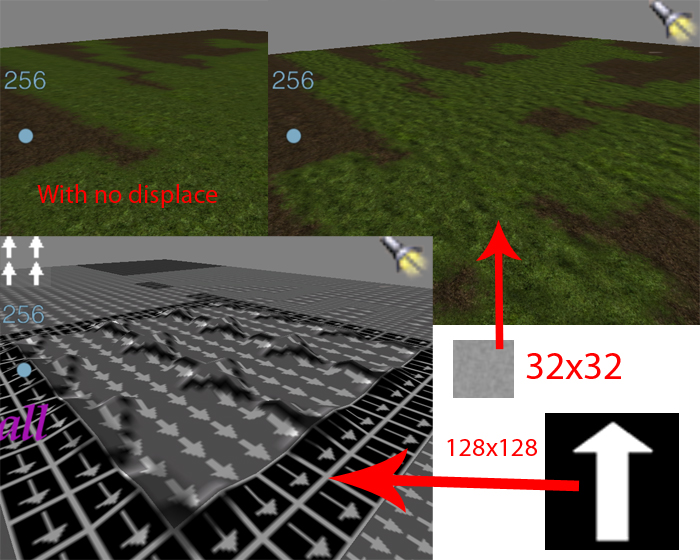
16. This is an optional step but we will do it for the tutorial, We will add some displacement grey scale maps that will deform the surface when in the players line of site.
Select> Displace, right click and replace the first six squares with j_foret 1-4 from the displace folder randomly, click "OK".

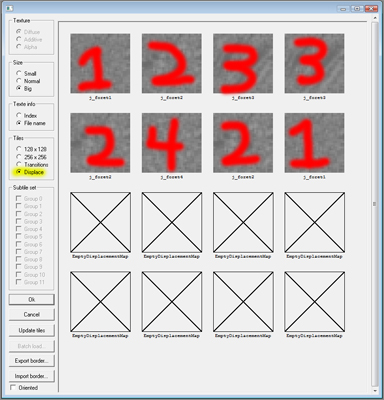
Extra> Using at least a small 32x32 grey scale is recommended with all textures to give it extra lighting detail.
...
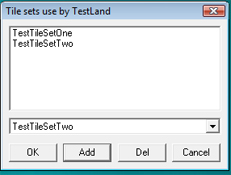
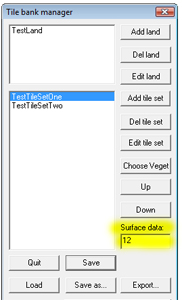
18. Now in the main menu highlight TestTileSetOne.
Under "Surface data" add 12 and for TestTileSetTwo add 21 (12 will make grass kick up from the players feet, 21 = dirt).
Click "Save".

19. At this point we should test out the bank in max.
Open 3DSMAX, Add a plane and make it 128x128.
Click in the "Top" of the view cube and fill the view port with the plane.


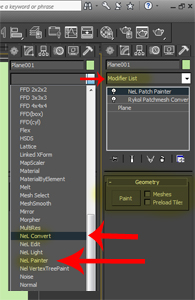
20. With the plane selected goto the modifier drop down menu and select "NeL Convert".
Go back the the modifier again and select "NeL Painter".

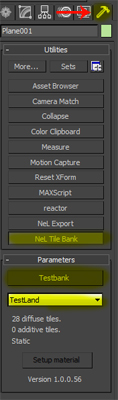
21. Goto the tools menu and click "NeL Tile Bank".
Navigate to your TestBank.bank.

22. Go back to the modify menu, Select the plane and press the paint button on the right.
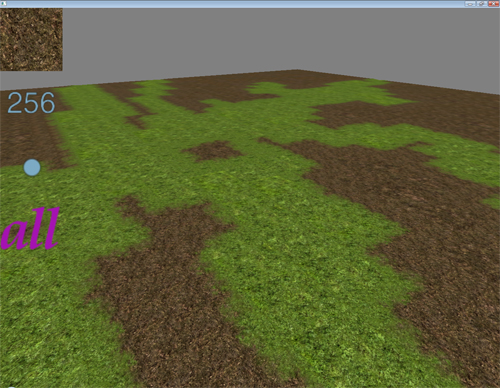
The terrain painter screen should pop up.
Begin painting and you should get smooth blending like you see in the picture below.
Note> Scroll down to "Painting Landscape With NeL Patch Painter" for the NeL Painter user guide.

Creating Landscape in 3DSMAX (status= testing and writing draft docs.
...
To begin painting your landscape just select the tile (Or tiles) you would like to paint and frame them in the view port, Then open NeL Painter.